


Suspending a ceiling with a wooden framework
Everything you need to know about covering a ceiling
For building a suspended ceiling, you don't need extensive craftsmanship experience or excessive tools. Instead, with just a few materials and some DIY effort, you can achieve fantastic results. However, it's always advisable to discuss your plans in advance with a professional. Only an expert can confirm the load-bearing capacity of the affected walls.
Home DIY experts Mascha & Tobi from traumhausprojekt.runie share their tips & tricks here!
Your guide
by Mascha and Tobi


Why Suspended Ceilings Make Sense
Often, it's for aesthetic reasons that homeowners are inclined to suspend ceilings in an flat or house. Lower ceilings can create cosiness, conceal pipes and ventilation ducts, or alter the ambiance of a room without the need to alter the building structure. Additionally, a suspended ceiling is ideal for effectively installing lights and lamps such as ceiling spots or indirect lighting.
However, suspending a ceiling also serves better sound insulation and thermal insulation. By suspending a ceiling, especially in very tall rooms, the volume, and thus ultimately heating costs, can be reduced. To suspend a ceiling with drywall panels, the substructure must first be attached to the existing ceiling. There are generally two options for this. Firstly, you can work with prefabricated metal profiles and corresponding accessories. Alternatively, a substructure made of wood is possible. In this step-by-step guide, we'll show you how to build a simple yet effective wood substructure for suspending a ceiling.
Good to know
Difficulty level: medium to hard
Costs: Depending on the chosen materials, around €10/sqm for the substructure, €4-5/sqm for the gypsum boards, or €10-20/sqm for wooden panels, additional costs for insulation material may apply
Duration: Approximately 1 day, depending on the scope of the project
The Must-Haves for Your Project
There's nothing like having the right tools
Materials
- ➤ Battens (40x60mm) in appropriate lengths
- ➤ Screws (approximately 140mm depending on ceiling structure)
- ➤ Roofing felt or thin woods for leveling
- ➤ Vapor barrier foil (optional)
- ➤ Tack nails for vapor barrier attachment (optional)
- ➤ Formwork boards (23x100mm) in appropriate lengths
- ➤ Screws for the formwork boards (60mm)
- ➤ Gypsum boards
- ➤ Gypsum board screws
- ➤ Gypsum joint compound (please follow manufacturer's instructions)
- ➤ Joint tape
- ➤ Sealing tape
- ➤ Suitable sandpaper for gypsum (120 grit)
Further Tools
- ➤ Ladder
- ➤ Spirit level
- ➤ Pencil
- ➤ Tape measure
- ➤ String
- ➤ Utility knife
- ➤ Bucket
- ➤ Trowel
- ➤ Gloves
Grab the tools and get started!
Suspending the ceiling step by step

Step 1: Substructure for Ceiling Suspension
First, use a pencil to mark the installation height of the substructure for ceiling suspension on the wall. To ensure the correct installation of the ceiling suspension later on, it is important to make sure that the chosen battens are horizontally aligned.
This can be particularly challenging when working in an old building. Therefore, using a spirit level is crucial.
Now, begin by attaching the first batten with a cordless drill-driver. The outermost batten of your substructure should be installed with a distance of about 20 cm from the wall. Then, the next batten should be screwed in at a distance of 40 to 50 cm. The closer the spacing between the battens, the more stable the wooden structure will be in the end.
To facilitate the installation of the subsequent wooden battens, you can now attach additional screws to the battens and horizontally stretch a string. This string will help you to align the next battens more easily. Despite this assistance, it's always worth double-checking with the spirit level. In some cases, differences in ceiling height (such as in old buildings) may need to be compensated for with woods or roofing felt. Alternatively, the use of leveling screws may also be beneficial.
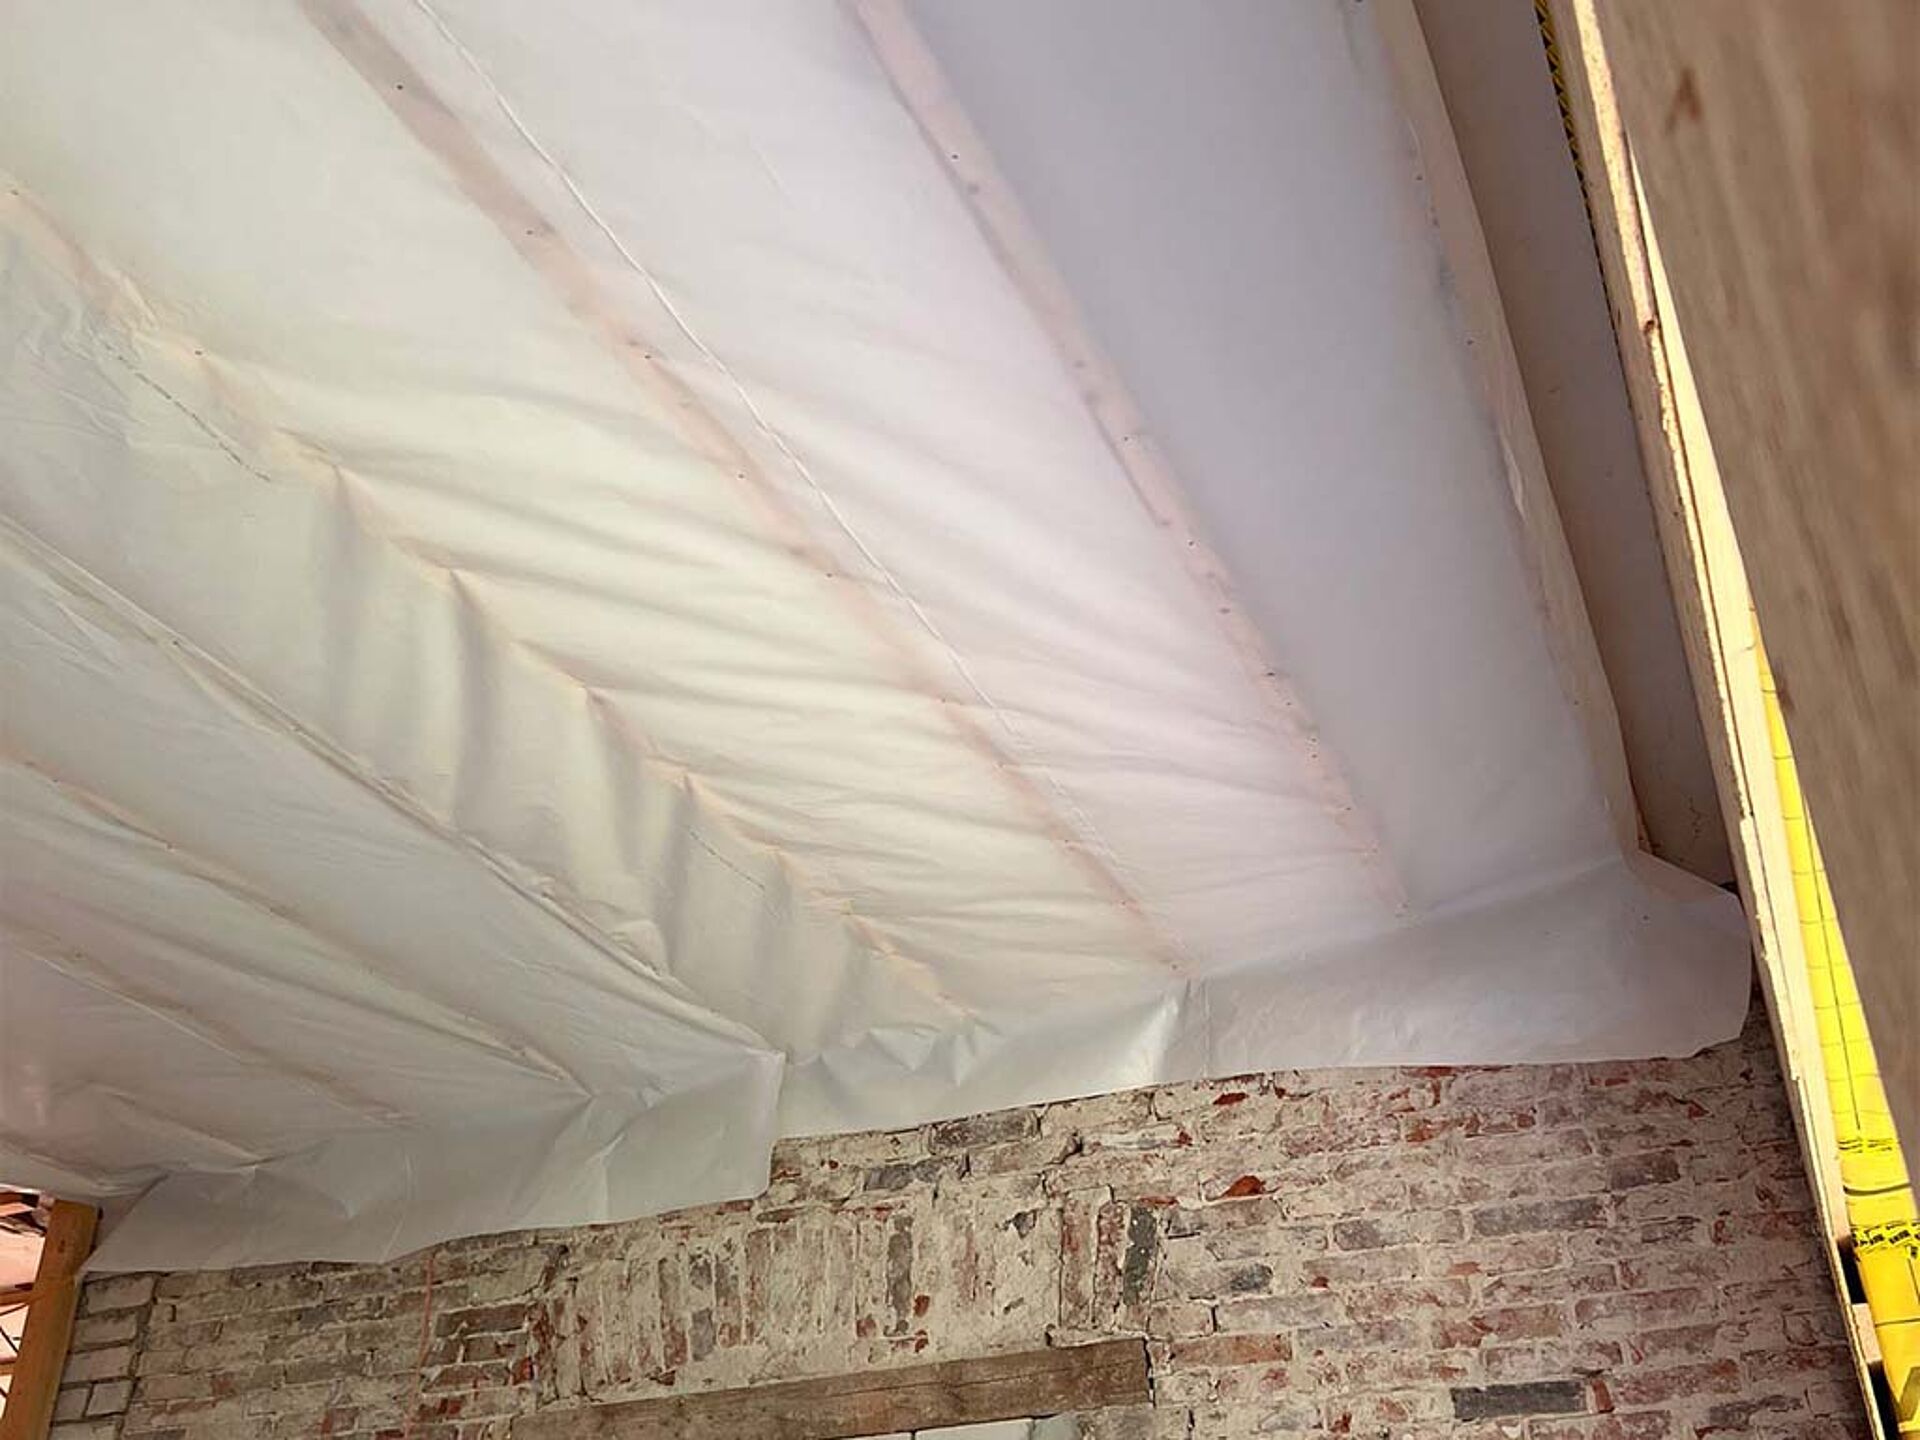
Step 2: Installing Vapor Barrier (optional)
If there is already an insulated area above the chosen room, it is recommended to install a so-called vapor barrier. Whether this is necessary in individual cases should be discussed with an expert in advance.
To install the vapor barrier, first cut the foil to the size of the ceiling using a utility knife. Then, use a stapler to attach the foil to the already installed battens.
Next, all stapler holes and the transitions between the foil and walls must be sealed with adhesive. This is to prevent moisture from seeping from bottom to top through the ceiling suspension later on.

Step 3: Attaching the Formwork Boards
Now, attach the formwork boards to the battens, creating a grid onto which the chosen gypsum boards can be screwed.
It's important to choose the spacing of the formwork boards so that you can easily screw the ceiling panels later on. For optimal support, adjacent panels should each rest centrally on the formwork boards.
Step 4: Installing Gypsum Boards
According to the grid chosen in the previous step, cut the gypsum boards to the desired size and attach them to the formwork boards using a cordless drywall screwdriver. You should use suitable gypsum board screws to achieve optimal results.
Instead of plasterboard panels, wooden panels can also be used for ceiling suspension at this point.


Step 5: Spackling Gypsum Boards
Prepare the joint compound according to the manufacturer's instructions either by hand or using a cordless paint mixer in a bucket, then apply it to the joints and screw holes of the individual panels using a suitable trowel.
The joint tape must be embedded into the fresh joint compound. Before the applied plaster dries, stabilize the joint tape with a second layer of gypsum. This process also prevents cracks from forming in the plaster after drying.
Step 5: Sanding
To finish, you'll need to sand the dried joint compound using a cordless drywall sander or a cordless rotating sander. If necessary, any uneven areas or holes can be filled with joint compound again and then sanded once more.

Our conclusion on DIY ceiling suspension
As you can see, constructing a drywall ceiling is easier than you might have thought. Even though the elaborate substructure may seem daunting at first, the benefits of a suspended ceiling certainly outweigh the challenges. It's a straightforward method for homeowners to save costs.
We wish you lots of success with your ceiling suspension project!