Vertical Herb Garden
DO IT YOURSELF
Add a truly special touch to your dishes with herbs you've grown yourself. Even if you don’t have a garden or only limited space on your terrace, you don’t have to miss out on the fresh flavour of home-grown herbs. A vertical herb garden offers a space-saving and visually appealing alternative to the traditional vegetable patch.
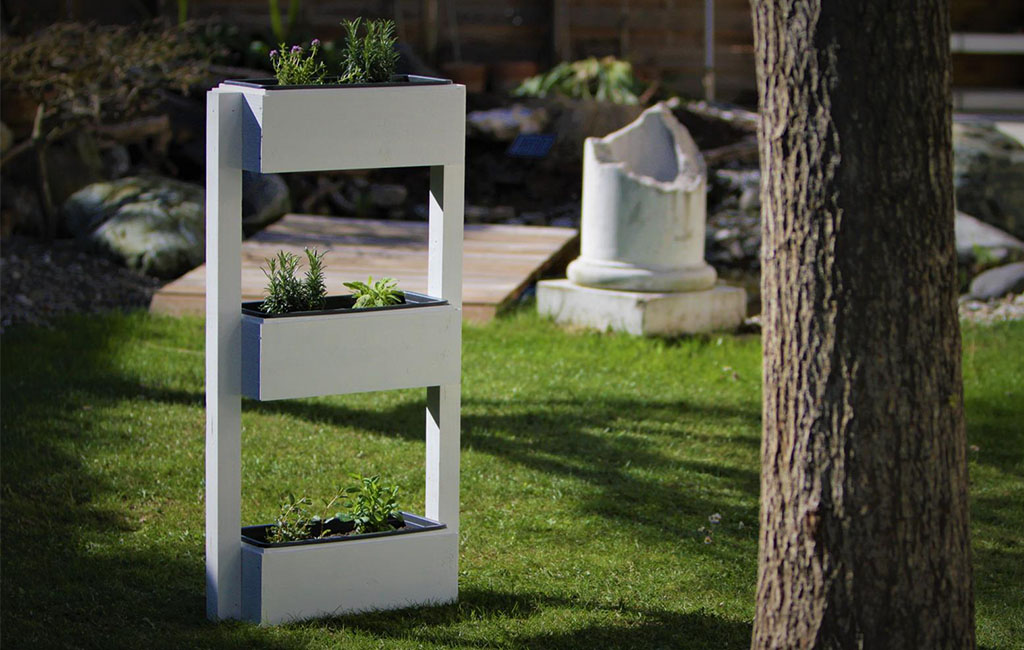
Tools & Materials
Werkzeug
- Mitre Saw
- Folding rule & pencil
- Cordless Screwdriver & Cordless Drill
- Multi Sander
- Frame clamp
Material
- 3 plastic flower boxes
- Planed wooden boards (approx. 5 linear metres), at least 17.5 cm wide (height of the flower boxes)
- 2 squared timbers, 5 x 5 x 120 cm
- Wood varnish & painting supplies
- Screws
- Soil & herbs
Building the Herb Garden
Step 1: The Basic Frame
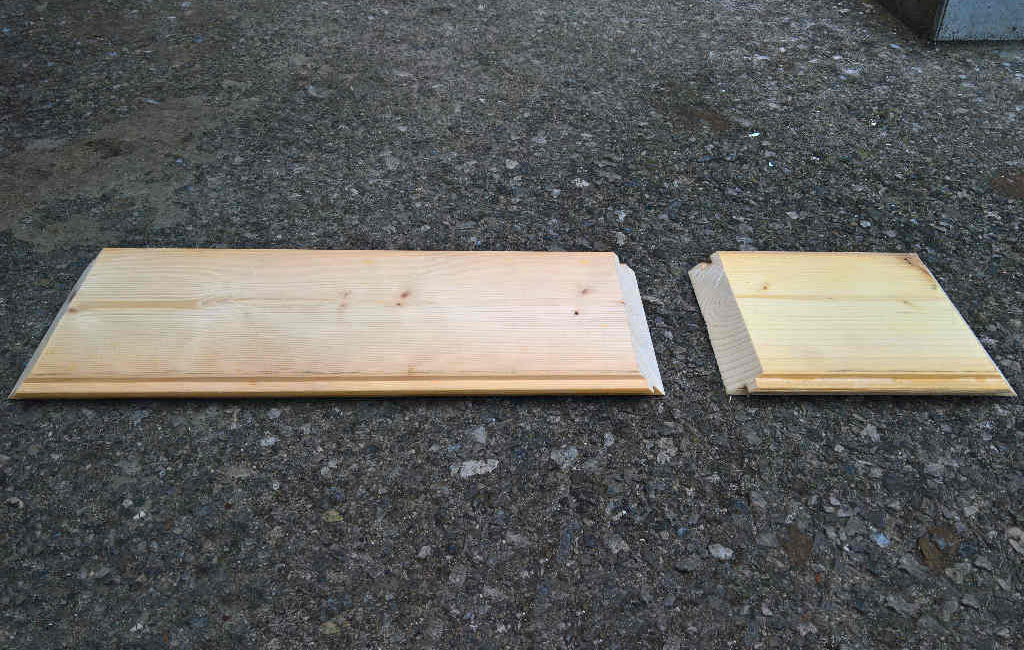
First, we cut our boards to the right length for the frames of the flower boxes. To achieve a neat and attractive look, we make mitre cuts at a 45° angle. The internal dimensions of the frames match the body of the flower boxes without the overlapping edges (these will rest on the wooden frame and support the weight of the box). A sharp saw blade will help prevent rough or frayed edges.

Since we’re building three tiers, we’ll need six longitudinal pieces and six cross pieces. Using the multi-sander, we’ll remove any remaining imperfections and smooth the surfaces.
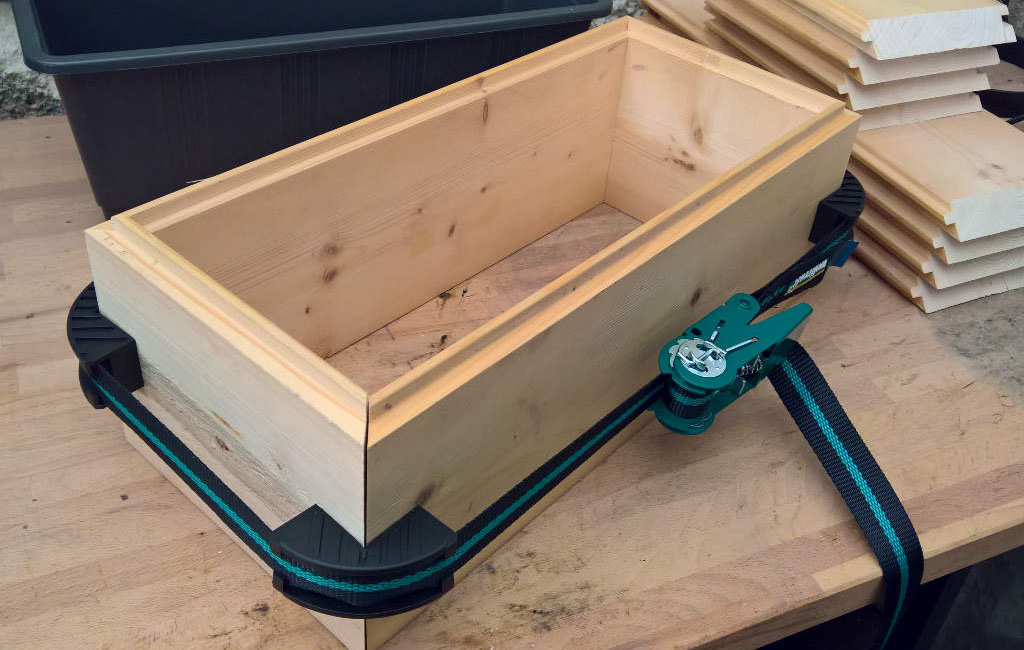
Step 2: Connecting the Wooden Pieces
In the next step, we’ll connect the wooden pieces. I opted for screws, as glued joints exposed to constant weather conditions may eventually weaken. For this, we’ll need a frame clamp to temporarily hold the structure in place so that we can pre-drill the holes for the screws.
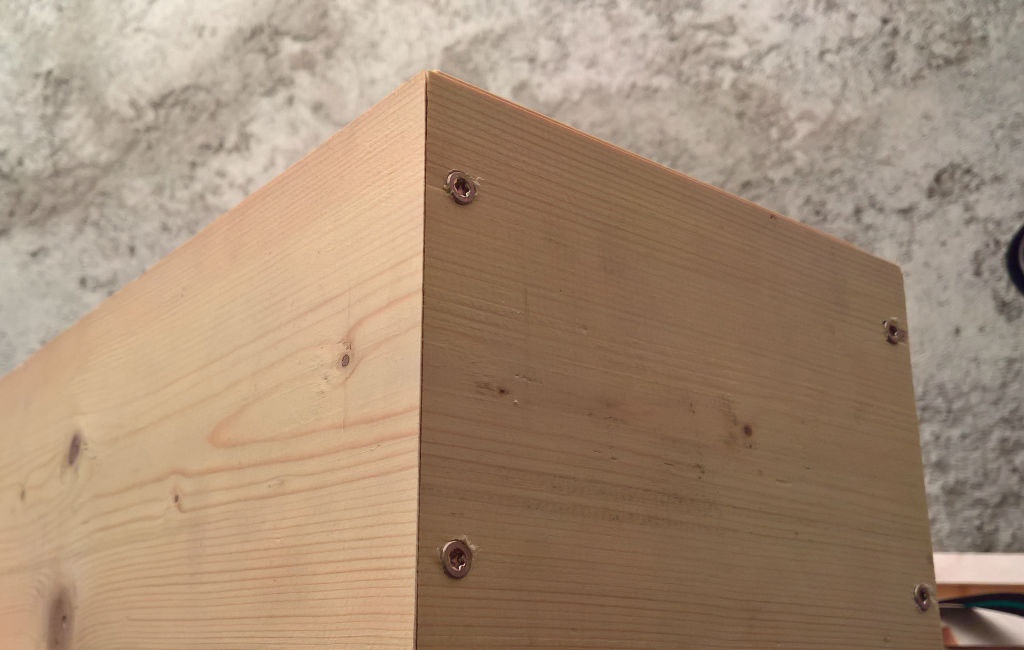
This is necessary because, due to the mitre cuts, we have to place the screws quite close to the edge of the boards, which increases the risk of the wood splitting.
To ensure the screws don’t become an eyesore, we place them on the narrow side of the frame and countersink the heads so they sit flush with the wood surface.
Step 3: Painting the Wood
Next comes the painting. It’s generally a good idea to choose a darker colour to help hide any mud splashes (which often occur when watering). However, I opted for white, as it matches the rest of my garden furniture better. Applying two coats with a foam paint roller gives the most even finish and provides the best protection against moisture and weathering.

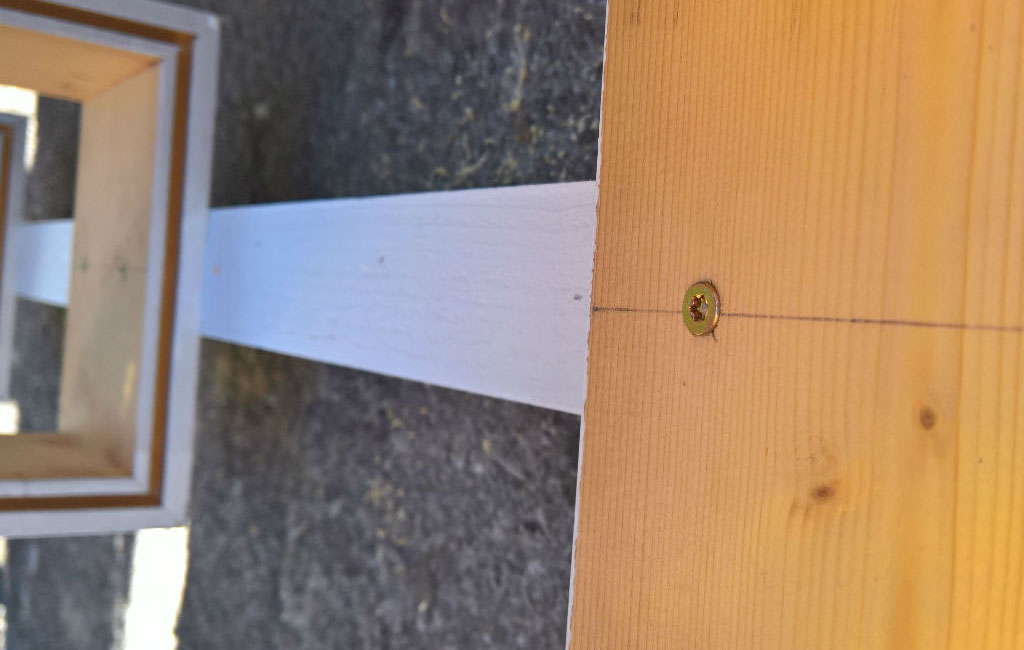
Step 4: Attaching the Squared Timbers
Once the paint has dried, we can screw the individual tiers to the squared timbers. If you want your herb garden to stand on an even surface, such as a terrace, the bottom tier will serve as the base (as shown in this guide). If you plan to anchor the timbers in the ground using ground spikes, attach the first frame 5 to 10 cm higher.
Step 5: Planting
That’s the technical part done – now it’s time to fill the flower boxes with herbs. Mediterranean herbs that need plenty of sun and can tolerate short dry periods are best placed in the top tier. Herbs that prefer consistently moist soil or partial shade will do better in the lower tiers. Don’t forget to drill holes in the bottom of the flower boxes to prevent waterlogging.

Herb Selection
To finish off, here’s a small selection of herbs you could plant in your vertical herb garden.
| Name | Usage | Soil / Location | Watering |
|---|---|---|---|
| Basil | Salad, pesto, soups | Nutrient-rich, sunny | Keep moist |
| Mint | Desserts, tea | Loose, sandy, shady | Little to moderate |
| Sage | Meat, vegetables | Warm, dry | Little to moderate |
| Lemon balm | Tea, desserts | Partial shade | Keep moderately moist |
| Oregano | Pasta, soups, meat | Sunny | Moderate |
| Thyme | Fish, meat, vegetables | Warm, sunny | Little to moderate |
| Rosemary | Fish, meat, pasta | Sandy, warm, sunny | Moderate |
| Tarragon | Fish, salad, sauces | Garden soil, sunny | Moderate |
Tools Used
Here you’ll find the Einhell tools used for this project.
Product was added to the comparison list.
Product was removed from the comparison list.
Open comparison list


