How to Sharpen your Drill Bits with a Bench Grinder
Nothing is more irritating than trying to drill a hole with a blunt drill bit.Blunt drill bits have got accumulated with me and it is time now to sharpen them. In this article I will show how to sharpen ordinary twist drill bits.
I always use my 150 bench grinder. Like most bench grinders, it is equipped with two stone wheels, coarse and fine, in different grain sizes (K60 and K32). To sharpen drill bits I use the fine wheel. But you can also buy special tools designed for sharpening drill bits.
To ensure that the drill bit does not wear out and becomes unusable, you should keep some water handy for cooling.

The theory of drill grinding
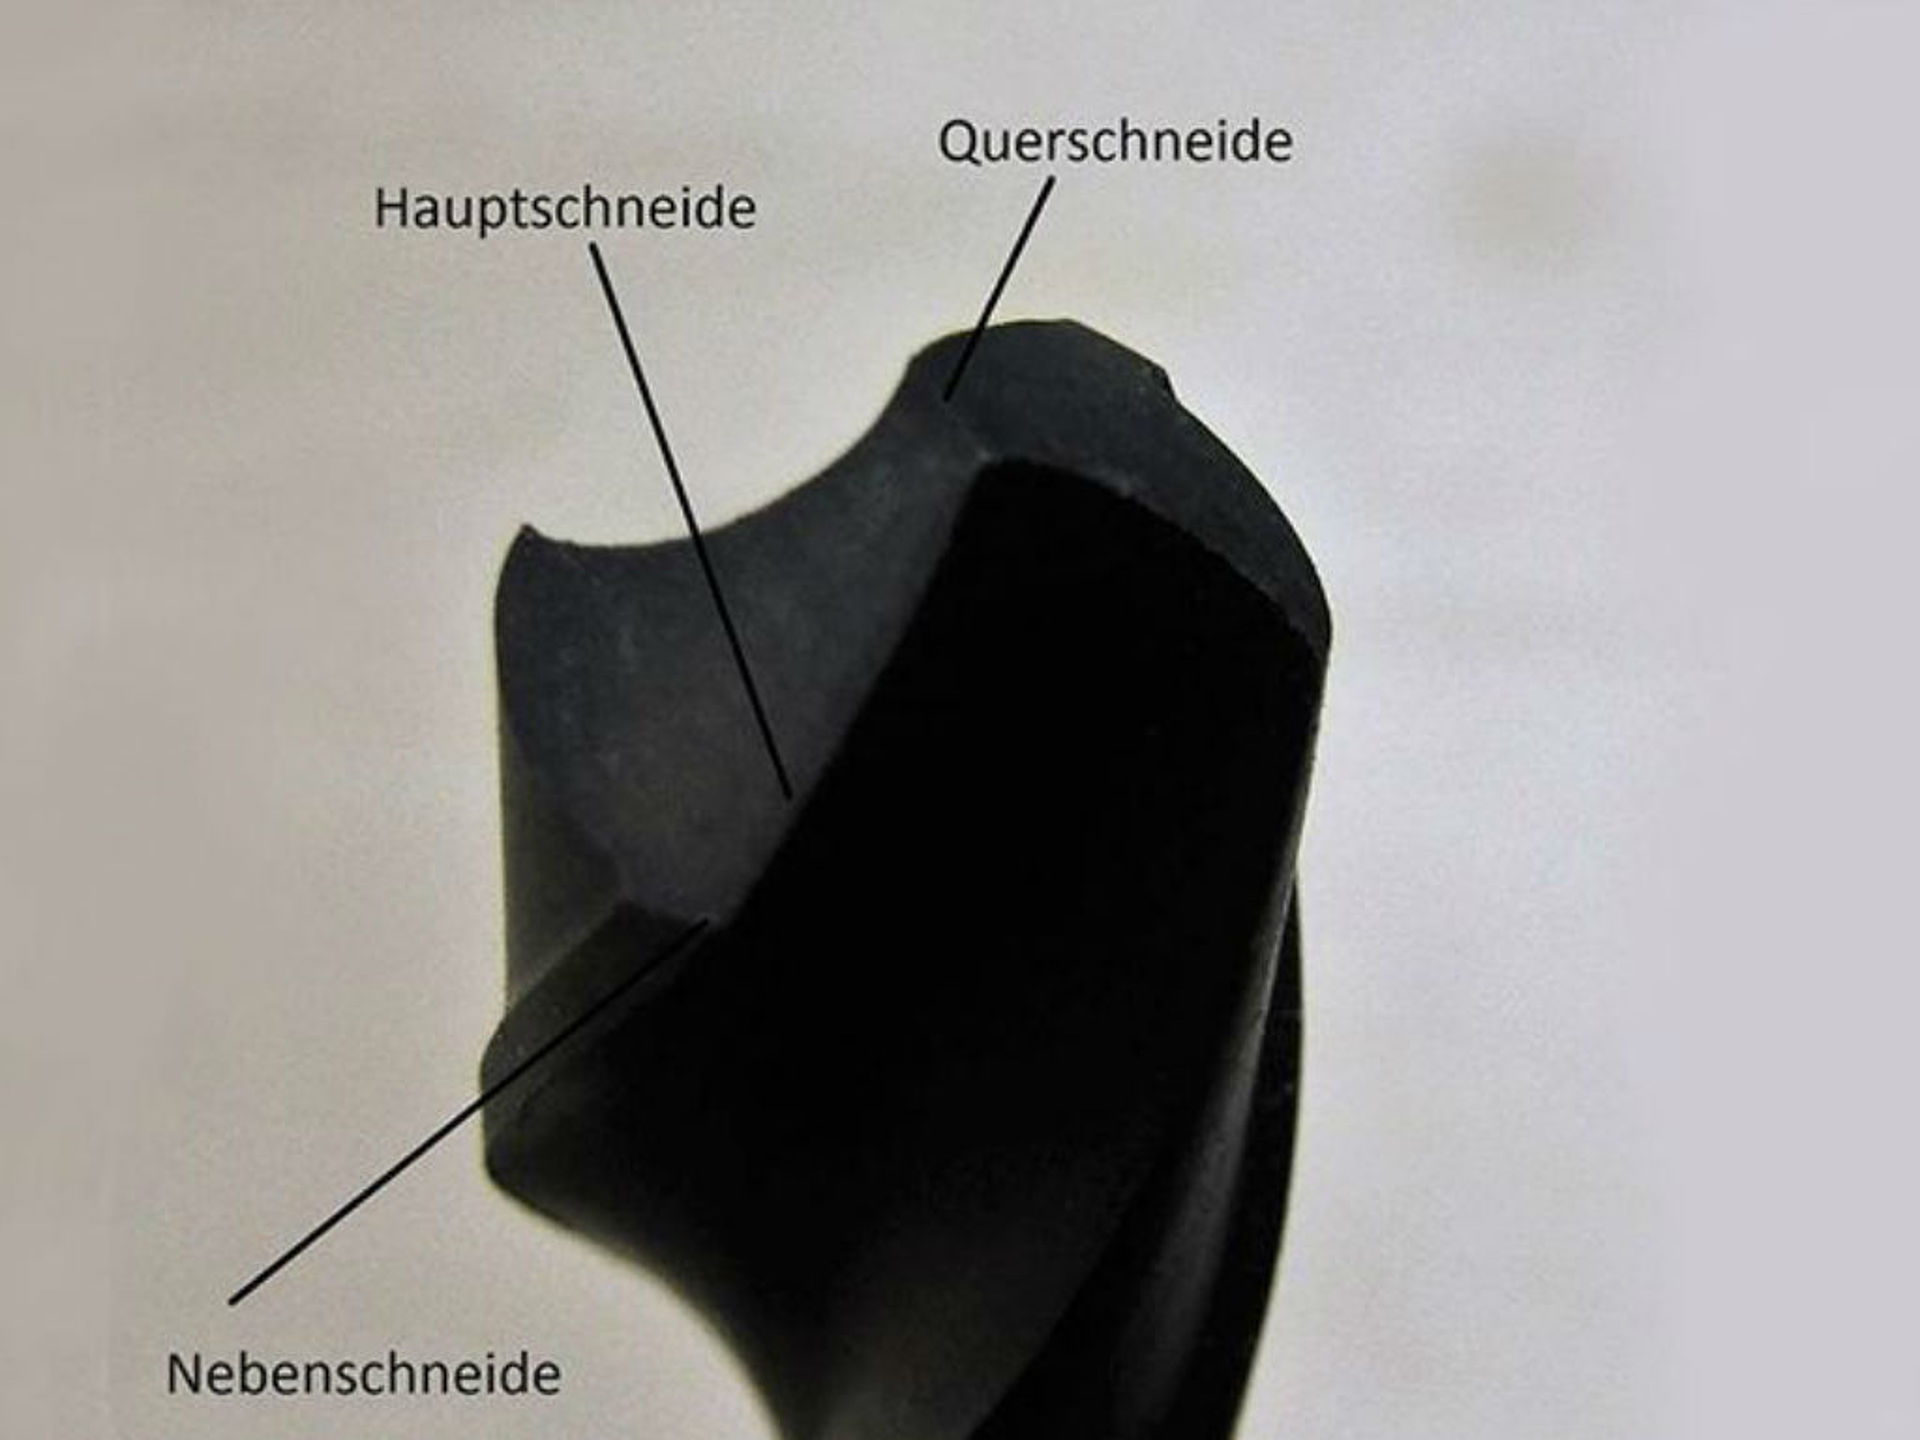
To do this, we will first look at a drill bit with different cutting edges. A twist drill bit has basically two and sometimes three cutting edges.
The main cutting edges
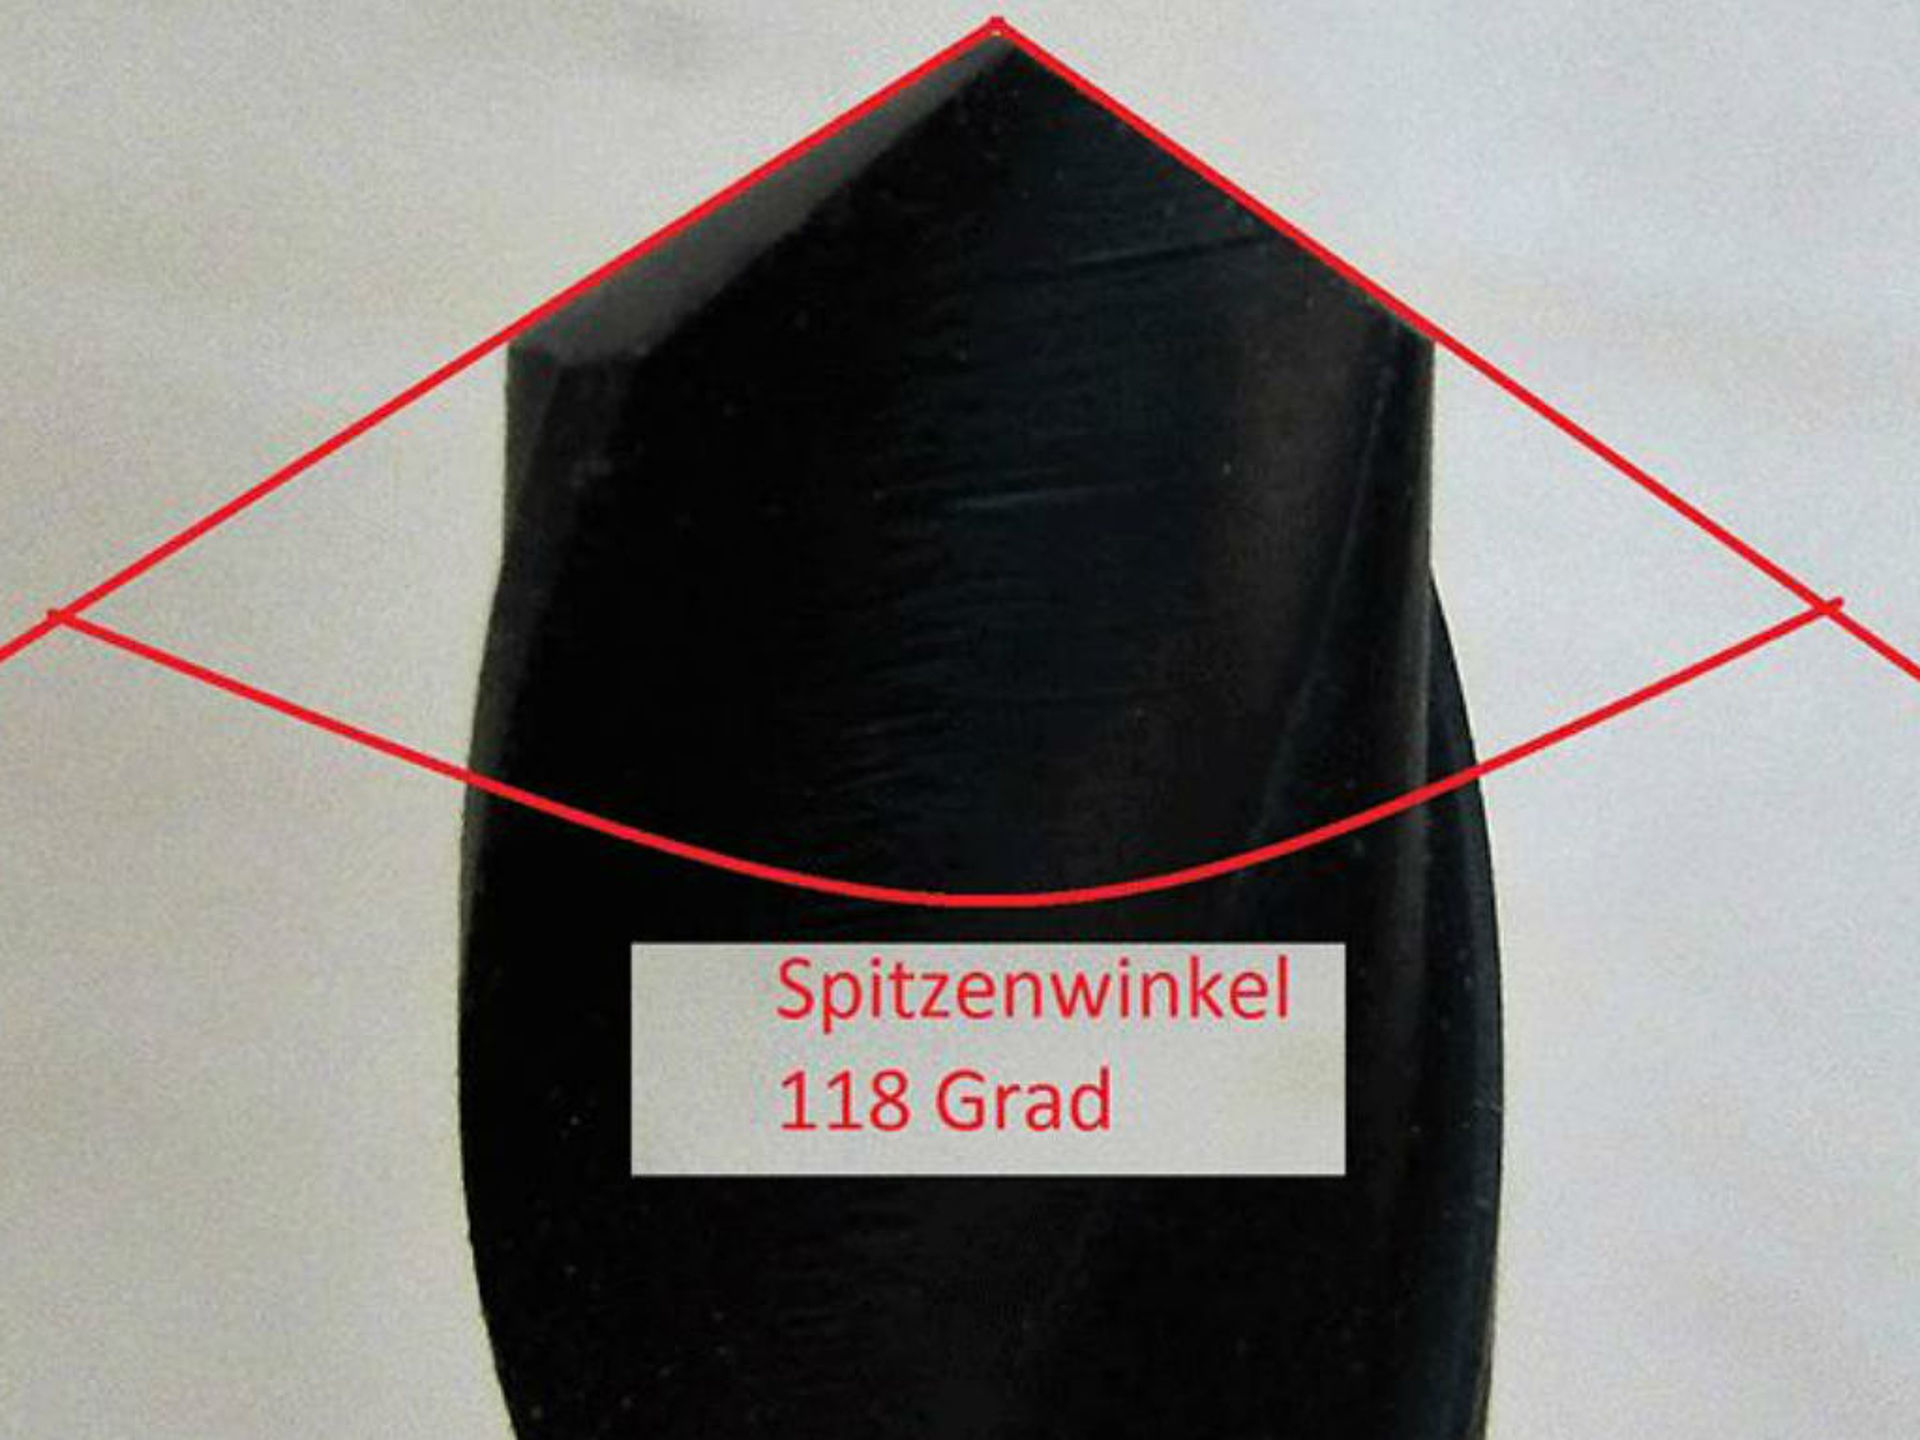
These are the two longest edges and are meant for cutting into the material. They take up, in a manner of speaking, the main task and in general are the first to get affected. They are at an angle of around 118 degrees to each other (point angle).

The secondary cutting edge
It is the outermost edge and not always there in all twist drill bits. It takes care that the drill bit makes a clean hole and supports it (smooth running).
The chisel cutting edge
It is placed on the material and twists into the material. It is this cutting edge that causes the drill bit to drift on a smooth surface. That is why, when drilling through metal or steel, you must pre drill or at least centre punch before actually beginning to drill.
The cutting angles
For a DIY enthusiast, it is not so critical if the point angle is 118 or 120 degrees. In my experience, a somewhat sharp drill bit is always better than a blunt one.
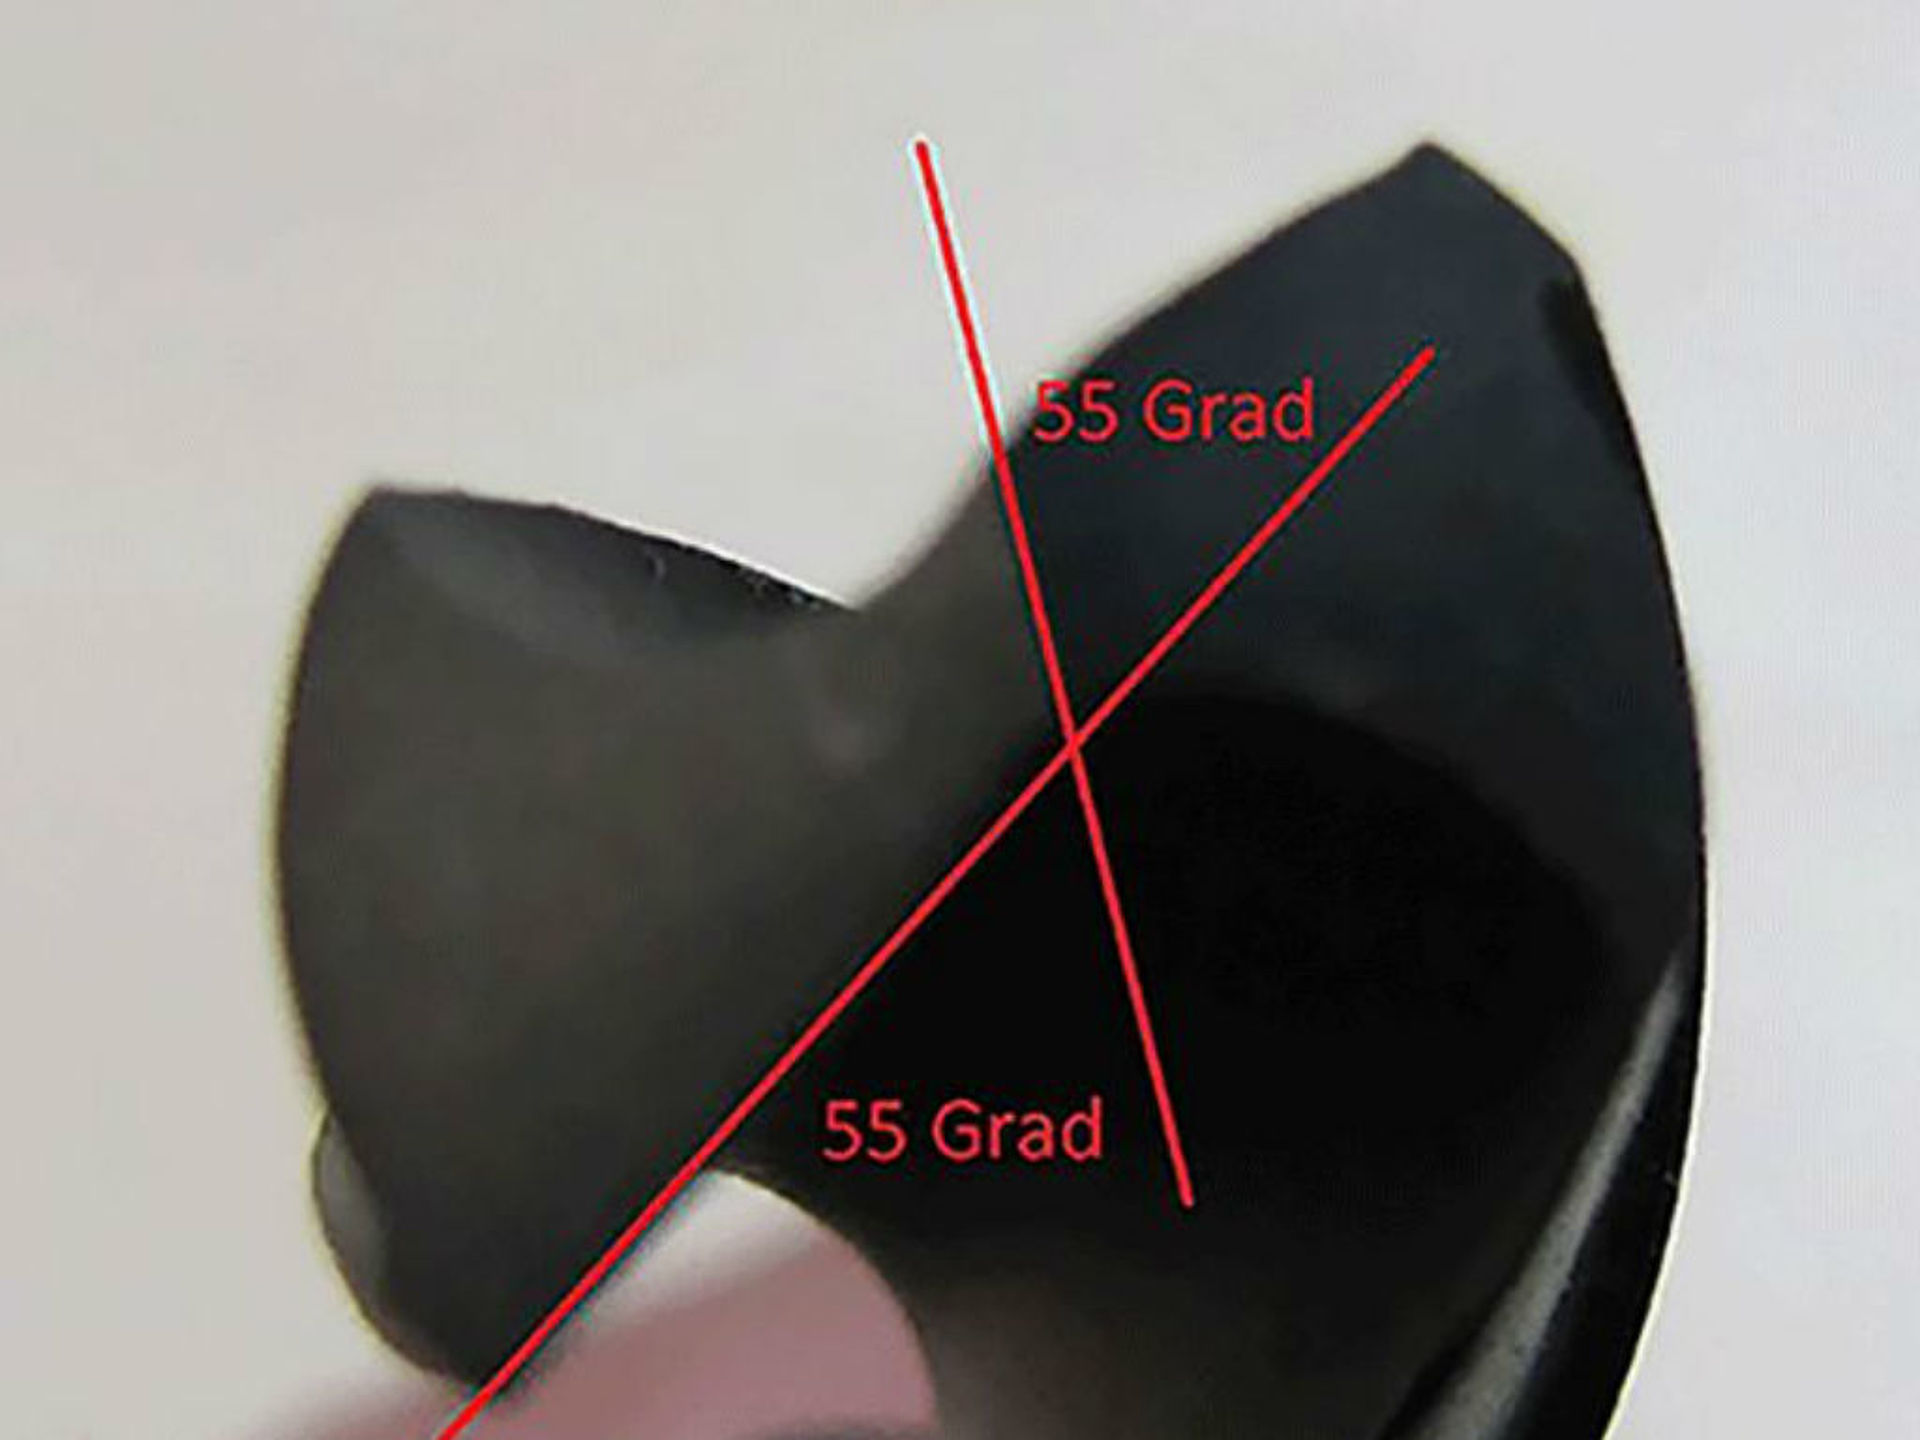
The chisel edge must be at an angle of 55 degrees to the main cutting edge.


Step by step to a sharp drill
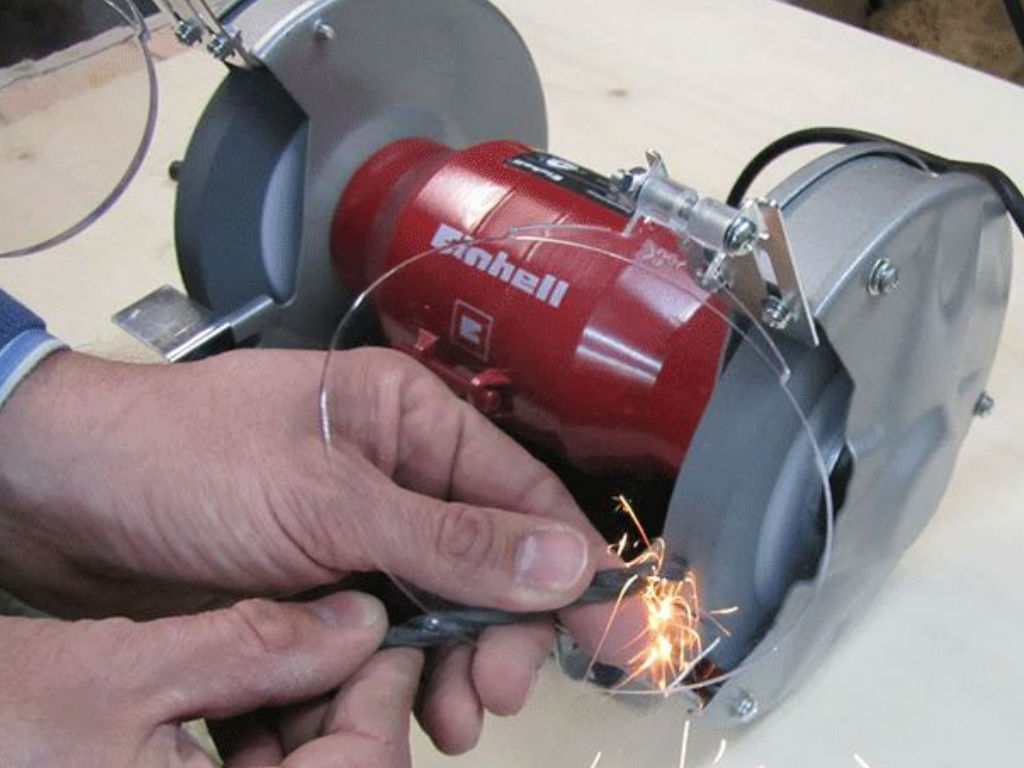
For practice, I would first suggest that you start with the largest possible drill bits. Hold the drill bit in your right hand and place it on your left index finger. Press it on the index finger using your left thumb. Now stand at a little angle on the left hand side of the bench grinder and put your left index finger on the grinder’s tray (also called spark deflector), so that you can comfortably place the drill bit on the grinder.
It now gets a bit tricky because you have to combine two movements. You place the drill bit with its left main cutting edge on the moving grinder wheel, and immediately and gently bring down the rear part (right hand), gently raise the front part (left hand) and simultaneously turn the drill bit in clockwise direction around one‐eighth of a rotation. You do not have to put too much pressure, but you must be careful, that when you are turning it, the drill bit continues to remains in contact with the grinder wheel.
After every one‐eighth rotation remove the drill bit and look at the tip. From this you can see whether you are holding the drill bit correctly or you need to correct something. If you put too much pressure or hold the drill bit too long against the grinder wheel, the drill bit becomes too hot. Before it glows or starts to acquire colour, you must cool it with water. If the main cutting edge shows a smooth edge, change to the second main cutting edge by turning the drill bit and proceed just as you did with the first one. Now all that you have to ensure is that the drill bit is centred, and both the main cutting edges are the same length.


